Drawing Fashion Illustrations- How to?
- Ananya Banka
- Mar 25, 2022
- 4 min read

Updated: Mar 30, 2022
Hii guys! I'm super excited to write this post. Its gonna be all about fashion figure drawings. I had been waiting for so long to finally start with it. Honestly, I am not very good with anatomy drawings. The proportions are a little difficult for me to understand but I will show you how its done and what all to keep in mind. Lets get started!
To begin with, here are a few things that we need-
Newsprint sheets, you can also use regular paper but for the first time, newsprint is always better.
Pencils, preferably 4B or 6B because you need darker pencils to work on newsprint
A ruler
Lets start with making the figure first. Then we move to drawing the face.
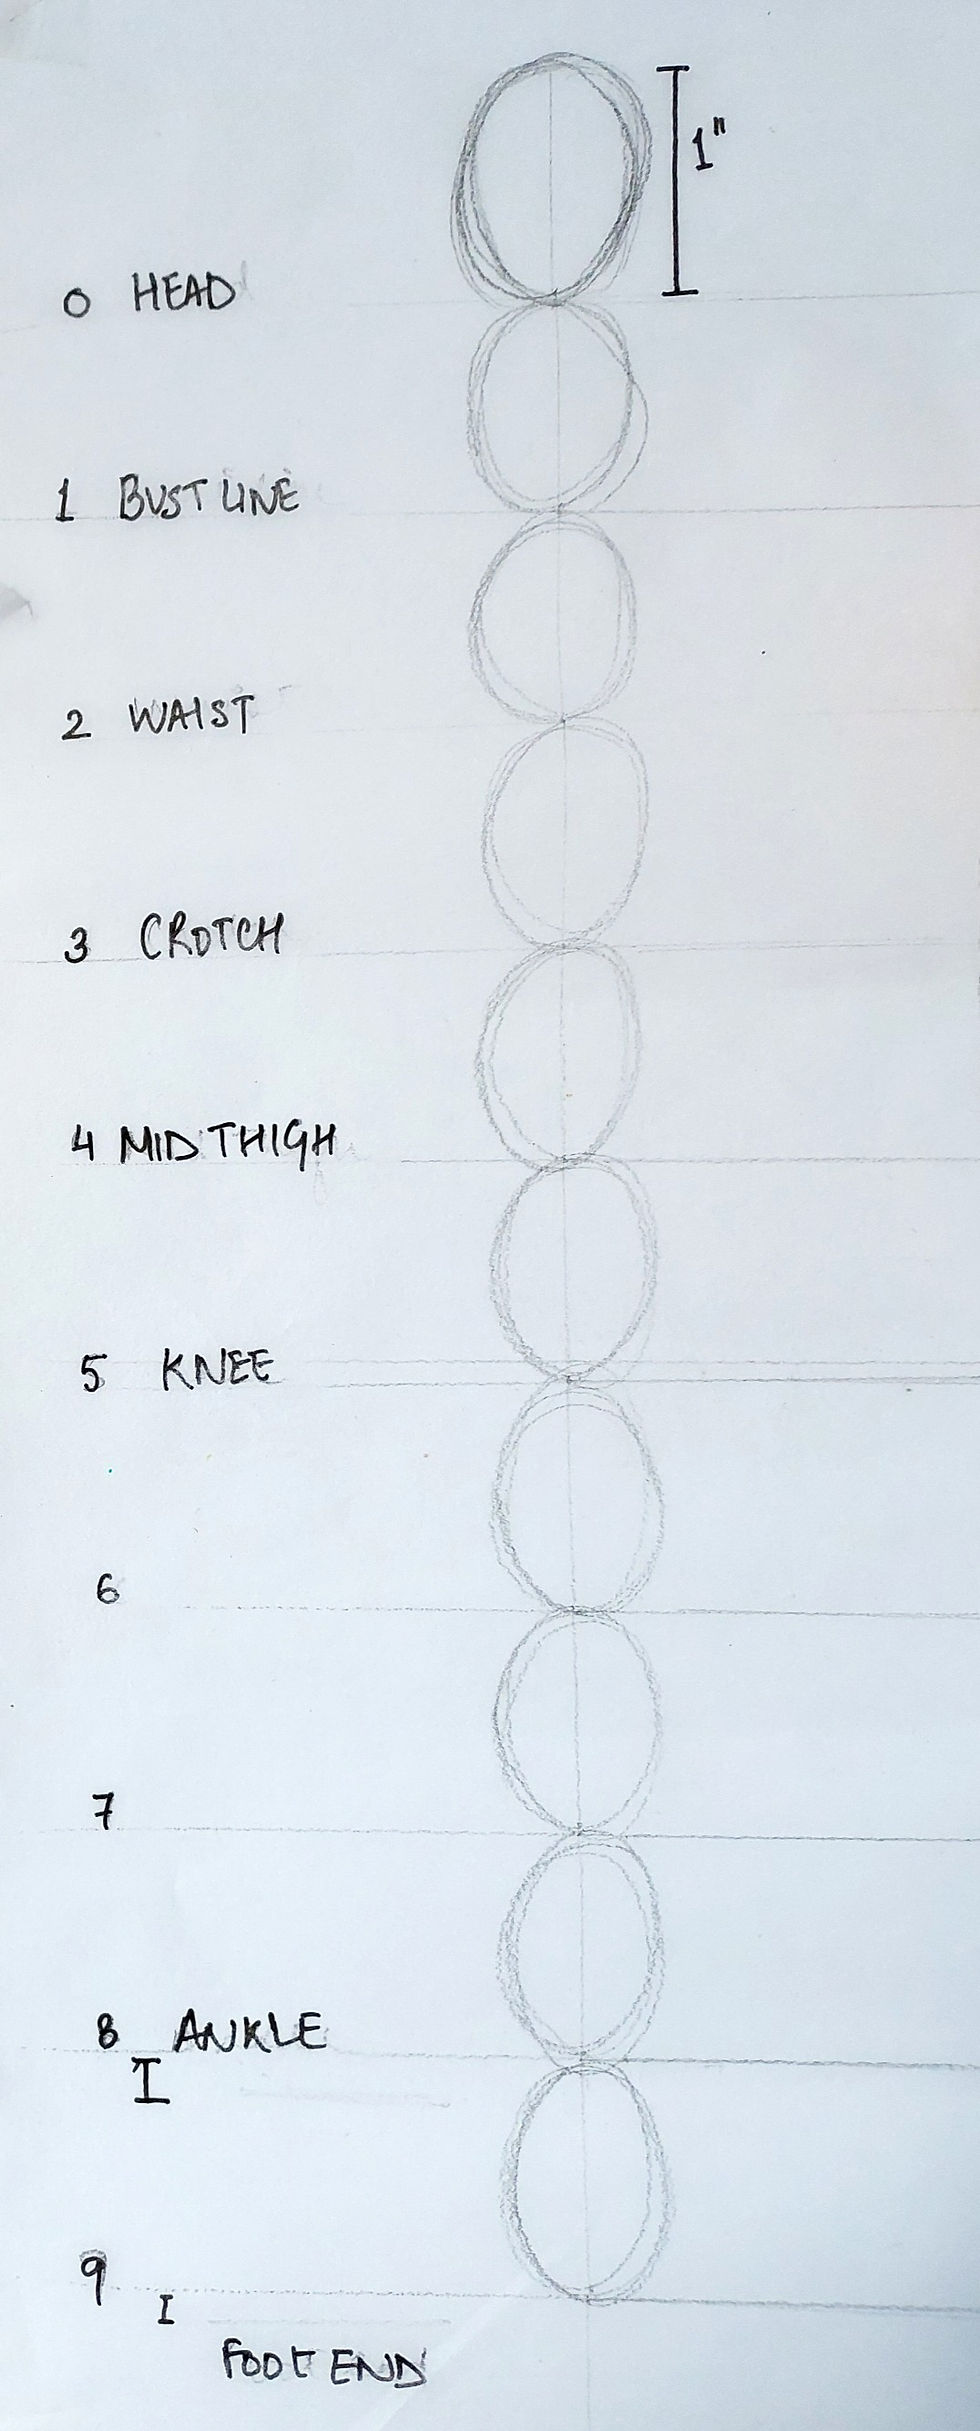
#1 Take your paper and draw a straight line of about 11 inches. Mark 1 inches and divide the line.
#2 Next draw ovals in each section that you made. These are called heads. The figures that we usually make are of 8 heads. Fashion figures are a little elongated. They are usually 9 heads or more. For this one, we are going to work with around 9.5 inches.
#3 Number all the lines starting from 0 to 9. Refer to the image below to know where to make the body parts. The ankle and foot end are slightly below 8 and 9 respectively.
This will be our guide to make the figure. As I already mentioned, I am not very good with anatomy but this guide really helped me make my figure sketch look like a figure sketch.
#4 Next we start by drawing the face. The face will always be in an oval shape. The neck starts from a little below the ears. Continue to make the shoulders and then the waist. You can leave the arms for a bit.
Then we make the crotch. The crotch line ends at number 3. From there we start drawing the legs. Remember to always keep space between the two thighs.
The knee starts at number 5. Try making the lines as smooth as possible because we are trying to show the curves.
#5 For elongating the legs, we never elongate the upper thigh. It will look very disproportionate. We can always elongate the lower thigh. It can extend upto 8 or 8.5 but since we are making the 9 heads figure, we will keep it till 8. From 8 we start drawing the curve for ankles and by almost 9 to 9.5 we finish with the foot.
#6 Now for the arms, it should reach around a little below the crotch line and the fingers should end by the mid thighs. Anything longer or shorter might look disproportionate.
The final figure should look something like this-

For a much easier way and to make your figure look symmetrical, you draw half the body on side of the paper and fold along the 11 inch line. Flip it and trace what you can see through the paper. This is how I drew my figures. Its only gonna work on newsprint sheets.

This is easy to try out for the first few times but once you get the hang of it, try drawing these on regular paper and try to get the symmetry right.
Next lets start with making the face. Making the face right can be very difficult sometimes. Even for that you need the right proportions. Lets begin.
For this we will need regular papers and pencils.
#1 We start by drawing a straight line in the middle of the paper. Then we mark our end points of the face. Join the points in a way that it looks like an inverted egg.
#2 Then we divide the face into two halves. That is our eye line. Now divide the space between the eye line and chin into half and that will be our nose. Below the nose, draw a line for the lip opening.

#3 Now we start drawing the eyes, nose, lips, ears and eyebrows. Drawing eyebrows is also an art. It takes time to get it perfect but we are not really looking for perfect right now. The ridge of the eyebrows should be symmetrical. The ears start a little above the eye line.
The eyeballs are always drawn half, we only show the full eyeball when we want to show the eyes wide open. Again, you don't have to be worry about making it look perfect.
#4 After all of this, We start with the hair. You can go ahead and make any hairstyle that you like. Shade some of the low points of the face to make it look more 3d. The sharper you draw the jaw, the more matured that face will look. Draw the neck and shoulders and done! You have your face ready.


Now lets combine both of these and start illustrating fashion figures.
For the figures, you can take any pose that you like. I made some of these head movements to help me with the faces that I want to make for my illustrations.

We will again make sections of 1 inches and start with the figures. The figures that we are making should show a relationship. We do not want them to look like two random figures.
I started with the same process, divided the paper and followed the guide. I did not want to start with any complicated garment.


I did not really like how the hand was looking on the second model so I decided to change it.

Next I traced it with a pen, cleaned up the pencil lines and added some color. I also tried drawing the face and hair to complete this illustration
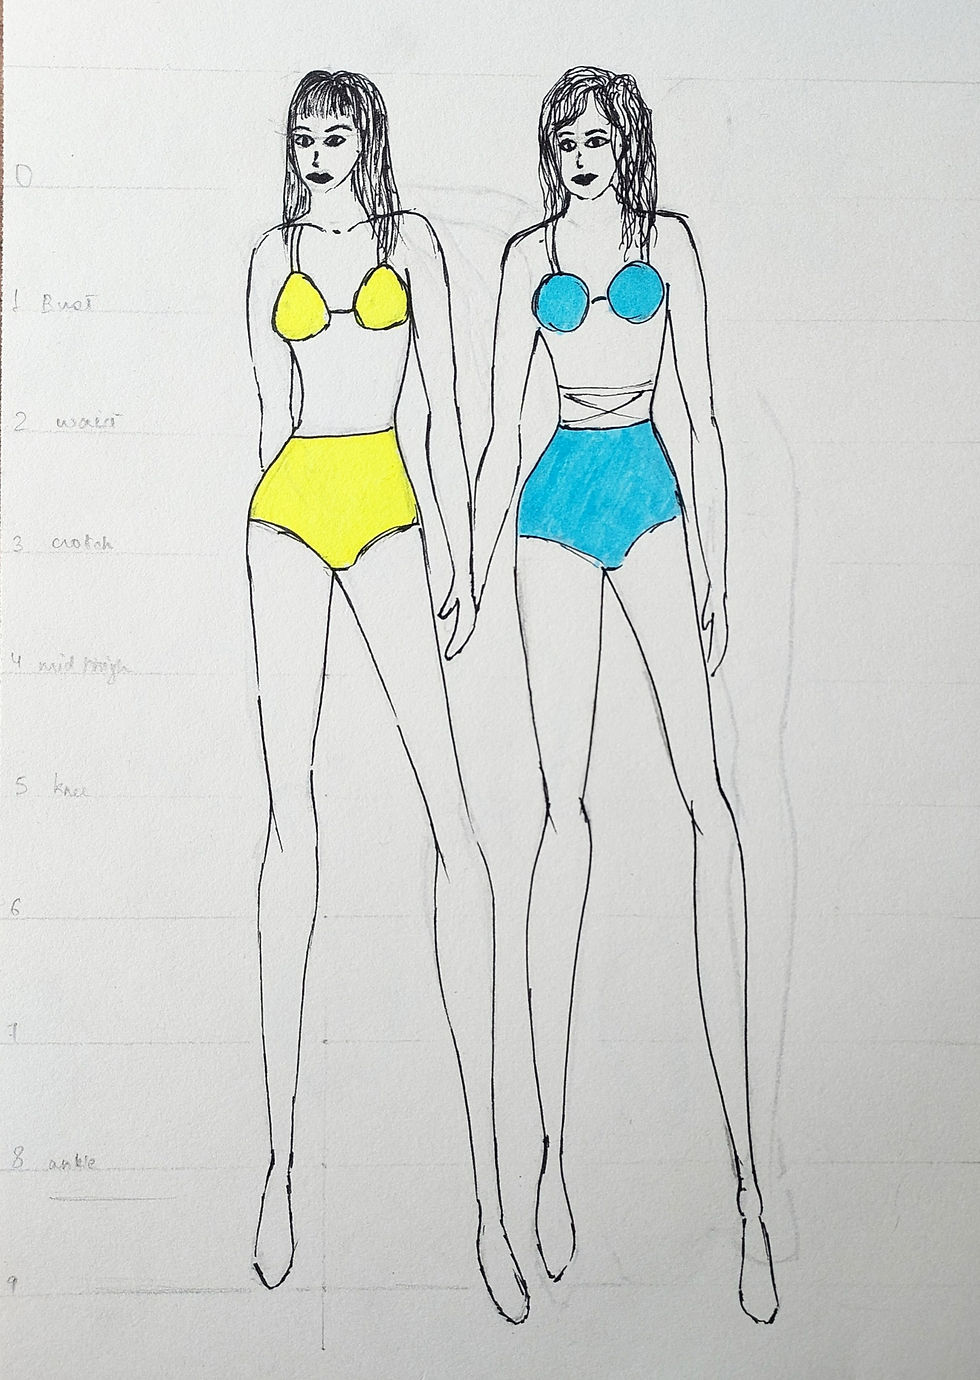
.
I am satisfied with how all these sketches turned out because it was my first time trying these out. I have to practice a lot more to perfect these and make good fashion illustrations because that is one very important part of designing. These sessions were great and I learnt a lot in them.
Thank you for reading! You can always subscribe to not miss any new post :)


Comments